Pistachio Pudding Cake

When someone successfully defends their PhD thesis in our department, we have a much-loved tradition of making them a personalized cake that ties into their research topic. This week, someone from my group defended, so of course it was cake baking time!

I did some reconnaissance at his practice talk for decoration inspiration, and quickly noticed something distinctly unique: every time “organic aerosol” was mentioned, this little face showed up:

OA_face

OA_venn

He had worked up his own silly image to reference organic aerosol throughout his talk, and boy oh boy did that make decorating a cake easy! Because who wants a cake that looks like this?

OHExposure

No one. Sorry, Dr., it’s a lovely figure for a science paper, but cakes ought to be more fun!

(Well, okay, maybe that would make a very impressive and colorful cake… but I’m a one-woman show here, and holy moly does that look difficult to translate into a cake!! Round faces are much easier and more forgiving.)

Additionally, his research involves putting organic aerosol (not actually living things, just FYI for anyone out there who’s confused by the faces) into a UV-light chamber and “aging” it via oxidation:

OA_chamber

Which he hilariously compared to a tanning bed:

OA_tanningbed

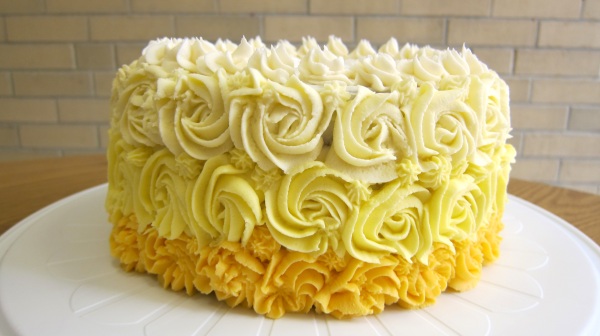
So, BOOM. Theme ready for cake execution!! Only one thing remaining: colored frosting can sometimes be… suspicious. How much coloring do you really want to consume, right? Needing green frosting meant I was looking for a green-flavored item; mint and pistachio sprang to mind. After consuming a fair bit of mint ice cream (three cheers for ice cream for dinner!), I wasn’t feeling the mint cake. I WAS, however, very intrigued by the prospect of a pistachio cake (hello, new flavor I’ve never worked with before!). So, without further ado, the cake to celebrate our newly minted Dr:

PistachioCake

Those ridiculous purple-rolls-in-a-white-box are meant to represent the UV lights in the chamber (hence the label of “New Dr.’s organic aerosol Tanning Bed”)… cut a girl some slack, okay?! I tried my best! And despite the fact that it would be AWESOME, my lab mates wouldn’t let me bring the actual UV lights out of the lab. Apparently something about contamination, safety, blah blah etc… whatever. It would have been cool, and you know it.

IMG_1765

IMG_1759

IMG_1768

~~~~~~~~~~~~~~~~~~~~~~~~~~~~~~~~~~~~~~~~~~~~~~~~~~~~~~~~

PISTACHIO PUDDING CAKE

*Courtesy of Karlynn Johnston at The Kitchen Magpie*

1 ¾ cups all-purpose flour

3 tablespoons cornstarch

4 teaspoons baking powder

1 teaspoon salt

¾ cup unsalted butter, softened

1 ½ cups white granulated sugar

1 (99g) package of instant jello pistachio pudding mix

4 large eggs

¾ cup chopped pistachios (¼ cup reserved for topping, if you desire)

1 ¼ cup whole milk

⅓ cup canola or vegetable oil

1 teaspoon vanilla extract

green gel food coloring (if you want a brighter green)

~~~~~~~~~~~~~~~~~~~~~~~~~~~~~~~~~~~~~~~~~~~~~~~~~~~~~~~~

INSTRUCTIONS

1. Preheat the oven to 325 degrees F. Grease and flour three (3) 8-inch round cake pans, or one (1) standard Bundt pan (12 cup capacity).

2. In a medium bowl, whisk together the flour, cornstarch, baking powder, and salt. Set aside.

3. Using an electric mixer on medium speed with a paddle attachment, cream together the butter and sugar until light and fluffy (about 3 minutes). Add in the pistachio pudding mix and combine thoroughly.

4. Beat in the eggs, one at a time, making sure each is well mixed.

5. Mix in the chopped pistachios.

6. Combine the milk, oil, and vanilla extract in a bowl.

7. Starting with the dry ingredients, alternate pouring a third of the dry and wet ingredients into the bowl. Mix thoroughly after each addition. After the last addition (which should be wet), mix on medium speed for 2 minutes. Add a few drops of gel food coloring (before the 2 minute mix) if you’d like brighter green cake.

8. Pour the cake batter evenly into the three cake pans and bake for approximately 50 minutes. The cake is done when a cake tester or toothpick inserted into the center of the cake comes out clean.

9. Invert the cake on a baking rack to cool.

10. Frost with pistachio pudding buttercream icing when the cake is completely cool, and sprinkle the remaining ¼ cup of pistachios on top if desired.

~~~~~~~~~~~~~~~~~~~~~~~~~~~~~~~~~~~~~~~~~~~~~~~~~~~~~~~~

PISTACHIO BUTTERCREAM ICING

*Courtesy of Karlynn Johnston at The Kitchen Magpie*

½ cup salted butter, softened

½ cup milk

3 tablespoons pistachio pudding powder

~3 cups powdered sugar

green gel food coloring (if you want a brighter green)

~~~~~~~~~~~~~~~~~~~~~~~~~~~~~~~~~~~~~~~~~~~~~~~~~~~~~~~~

INSTRUCTIONS

1. In an electric mixer fitted with the paddle attachment, cream the butter until light and fluffy.

2. In a small bowl, combine the milk and pudding mix until completely dissolved. This is very important! If it is not completely dissolved at this point, you will have gritty icing! And no one likes gritty icing.

3. Beat the pudding mixture into the butter completely. Add a few drops of gel food coloring at this point if you’d like brighter green icing.

4. Add in the powdered sugar slowly (about ½ cup at a time), beating in completely.

5. Chill for approximately 20 minutes to allow the jello and butter to set.

6. Decorate your cake! This makes about 2 cups of icing.

~~~~~~~~~~~~~~~~~~~~~~~~~~~~~~~~~~~~~~~~~~~~~~~~~~~~~~~~

Mmm pistachio cake… such an unusual, unexpected flavor. It was quite the hit with everyone! Even the doctor of the hour, who normally doesn’t care for cake, said it was very good. Success!

Next time you need to bake a cake, why not venture outside the realm of the obvious and try a pistachio cake? Most people have never eaten a pistachio cake before (me included), so if you’re going to break that wall down, you may as well do it with an exceptional recipe like this one (instead of most pistachio cake recipes that use a boxed cake mix). I promise you won’t regret it. It’s tout à fait délicieuse!

IMG_1767

Caribbean Banana Bread

Have you ever been asked about your stance on banana bread? The options are pretty much always plain, nuts, or chocolate.

Why is this? Why limit yourself to these simple, obvious ingredients?

Why not add whatever you want?

Don’t get me wrong: classic banana bread is wonderful. But sometimes you want to shake things up, sometimes you want to try something new, sometimes you realize your shredded coconut is – shoot! – past its expiration date and you could either throw it out or test your immune system’s ability to defend itself against expired coconut (what even happens when coconut “expires”? It just seemed dry to me)…

banana bread

This recipe starts with a good staple version from The Kitchn, and then amps it up. In the easiest way possible. Because I was bored. And hungry. And maybe a teensy bit lazy (what, can’t a girl crave some banana bread with minimal work involved?). A little rummaging in my cabinet lead to a Caribbean-inspired bread that really just tastes like dessert. And happiness. Why wouldn’t you want to add to banana bread?

You can go crazy with this recipe. Banana bread is hard to mess up. Once you get the basics (flour, eggs, sugar, bananas, etc.) then you can play with it (walnuts, pecans, toasted shredded coconut, chocolate chips, toffee bits, raisinettes, butterscotch chips, the possibilities are endless!). I added ~3 extra cups of ingredients to this recipe and it was perfectly fine. So get creative, work with what you have, and report back to me on how it goes!

~~~~~~~~~~~~~~~~~~~~~~~~~~~~~~~~~~~~~

CARIBBEAN BANANA BREAD

½ cup (1 stick) unsalted butter

1 cup sugar (brown or white; I used half and half)

2 large eggs

2-3 bananas, super ripe

¼ cup milk

1 tsp. vanilla

2 cups flour

1 tsp. baking soda

½ tsp. salt

½ cup chocolate toffee bits

1 ½ cups chopped walnuts or pecans, toasted

¾ cup shredded coconut, toasted

~~~~~~~~~~~~~~~~~~~~~~~~~~~~~~~~~~~~~

Instructions adapted from The Kitchn.

1. Heat the oven, prep the pan, and toast the coconut and nuts: Preheat the oven to 350°F with a oven rack in the bottom third of the oven. Grease the loaf pan with butter or baking spray. Line a baking sheet with parchment paper or aluminum foil, spread the shredded coconut and nuts evenly over the top, and toast in the oven while it preheats (~10 minutes, but watch them closely and pull out once the coconut turns golden). 

2. Melt the butter: Melt in the microwave. Or, if you have room temperature butter, you can use that for a fluffier cake.

3. Combine the butter and sugars: Whisk together the melted butter and sugars in a large bowl until combined. (Or cream in a mixer until fluffy.)

4. Add the eggs: Crack the eggs into the bowl and whisk until completely combined. The mixture should be smooth.

5. Add the milk and vanilla: Whisk into the batter until combined.

6. Mash in the bananas: For chunky banana bread, peel the bananas and add them directly to the bowl. Using a dinner fork, mash them into the batter. If you want a smooth bread, mash the bananas separately until no more lumps remain, and then whisk them into the batter.

7. Add the flour, baking soda, and salt: In a smaller bowl, stir together the flour, baking soda, and salt. Use a spatula to stir the dry ingredients into the wet batter until they are just barely combined and no more dry flour is visible.

8. Fold in the nuts, coconut, chocolate toffee bits, etc, if using: Scatter everything over the batter and gently fold them in.

9. Pour the batter into the pan: Use the spatula to scrape off all the batter from the bowl. Smooth the top of the bread batter.

10. Bake for 60 to 70 minutes: Place the pan in the oven. Bake until the top of the cake is caramelized dark brown and a tooth pick or cake tester inserted into the middle comes out clean. Baking time will vary depending on the age of your bananas, how many things you add, etc. — start checking around 50 minutes and then every five minutes after.

11. Cool in the pan for 10 minutes: Set the loaf, still in the pan, on a cooling rack. Let it cool for 10 minutes so it solidifies and gets easier to remove from the pan.

12. Remove from the pan and cool for another 10 minutes: Place your (clean!) hand gently on top of the loaf and flip it over into your hand. Set it back down on the cooling rack to cool for another 10 minutes before slicing. Leftover bread can be kept, covered, at room temperature for several days or wrapped in foil and frozen for up to 3 months.

~~~~~~~~~~~~~~~~~~~~~~~~~~~~~~~~~~~~~

Easy, delicious, and unique. Use any ingredients you have on hand – the only things that really matter are the ripe bananas. Recommandation d’experts: spread some butter on a freshly cut piece of this bread for a perfect, decadent treat. Besides, what are a few more calories anyways?!

caribbean banana bread

Coconut Lemon Pineapple Ombre Cake

That’s a mouthful, for sure. A delicious, citrus-y, sugary mouthful.

pineapple coconut ombre cake yellow

This might be the prettiest cake I’ve made so far, in celebration of my favorite Erin’s birthday.  Which was ages ago. Sorry I’ve been behind in posting! I’ve built up so many pictures and recipes waiting for me to find time to share them with you all… oops. Grad school makes balancing life sort of tricky. Especially when I decided to add a new hobby to my repertoire: rock climbing. Super fun stuff – some of my favorite people out here are fantastic climbers and got my does-it-involve-running?-because-I-don’t-run self hooked. But with school having started again, it means I’m constantly grinding myself into the ground attempting to balance classes, research, preparation for a conference (we leave Monday and I have to finish my poster still… apparently last minute stress is a major part of grad school), preparation for a research trip to Berkeley (WAHOO! research-funded trip to my undergrad stomping grounds), and other lab commitments with sanity-saving activities like sleeping, grocery shopping, hanging out with friends, spending time with the boy, and partaking in hobbies like dancing, rock climbing, and baking. I guess that’s what it means to be human, right? We’re all doing our best to load our schedules up and then complain about having no time!

how to decorate a coconut cake

So instead of complaining, I’ll give you this cake. Good trade, yes?

yellow ombre coconut pineapple lemon cake yellow swirled frosting

This cake was so much fun to make, putting both my cake decorating supplies and skills to the test. And it’s YELLOW!! Right there, its beauty was a done deal.

yellow ombre cake layers

See those layers? Yeah. They’re ombre. Like the frosting. It’s cool, I’m basically a professional. Please don’t judge me; I’m aware I took a lot of pictures. But it’s the first I’ve attempted something this complex, so forgive me: I’ve got a case of parental pride.

layer cake ombre yellow pineapple lemon coconut

I should probably give my Facebook password to my best friend now, so when I have kids someday, she can disable my account before I become a crazy parent who post pictures every.single.day of their child’s face. And their child eating. And smiling. And crying. And running around. And drawing pictures. And reading books. And generally being adorable and precious and magical. Because I could be one of those parents; you’ve seen what I did with this cake. Consider yourself warned.

how to decorate ombre coconut cake

This cake comes from all over the place. I started with this recipe on Food.com by PanNan as my “base” recipe, and changed it up with insight from my own baking experiences as well as other recipes on EatingWell.com and TasteOfHome.com. I found a nice, stiff cream cheese recipe on Food.com by Trixyinaz that was perfect for piping. Google “ombre cake” if you want to be amazed by the most beautiful cakes ever – those photos were my inspiration.

~~~~~~~~~~~~~~~~~~~~~~~~~~~~~~~~~

LEMON PINEAPPLE CAKE

1 (15-16 ounce) can crushed pineapple in juice, undrained (divided use)

1 ½ cups (3 sticks) unsalted butter, softened

½ cup sour cream or plain Greek yogurt

3 cups sugar

5 eggs

1 tsp. baking soda

2 tsp. baking powder

½ tsp. salt

3 cups cake flour, sifted

1 tsp. lemon extract

1 tsp. vanilla extract

PINEAPPLE FILLING

2 large egg yolks

(crushed pineapple + juice from above)

1/4 cup granulated sugar

5 tsp. cornstarch

CRUSTING CREAM CHEESE ICING

1 cup butter, softened

½ cup vegetable shortening

1 lb cream cheese, softened

1 tbsp. vanilla extract

3 ½ lbs sifted powdered sugar

½ tsp. salt

Food gel coloring

3-4 ounces shredded coconut

~~~~~~~~~~~~~~~~~~~~~~~~~~~~~~~~~

1. Grease three 9″ round cake pans, and line bottoms with parchment paper. Great the top of the parchment paper. Preheat oven to 350 degrees F.

2. Separate the crushed pineapple and juice, saving both.

3. In a large bowl, beat butter at medium speed with a mixer until creamy; gradually add sugar, beating well. Add eggs, one at a time, beating until blended after each addition.

4. In a separate bowl, whisk together the flour, baking soda, baking powder, and salt.

5. Combine ¾-cup pineapple juice with the sour cream (it won’t mix well, don’t worry). Add juice mixture to butter mixture, alternating with the flour mixture. Beat at low speed until just-blended after each addition. Stir in extracts.

6. Pour 1/3 of batter into each of the prepared cake pans. Bake at 350 for 25-30 minutes or until a wooden pick inserted in center comes out clean. (I’ll admit I can’t remember how long this took; watch closely starting at 20 minutes!)

7. Remove from pans immediately and cool on wire racks.

8. Make the filling while the cake cools. Stir together egg yolks, sugar, ½-cup pineapple juice, all the pineapple, and cornstarch in a saucepan. Cook over medium-low heat, whisking constantly, until thick and beginning to bubble, about 5 minutes. Let cool completely.

9. When both the cakes and filling are cool, make the frosting. Cream the butter, shortening, cream cheese, and vanilla extract. Gradually add confectioner’s sugar and salt. Beat on low speed until creamy.

10. Stack cake layers, spreading ¾-to-1 cup pineapple filling between each layer. Spread a thin layer of cream cheese frosting on sides and top of cake. Spread shredded coconut on the top, leaving a ½” border around the edge of the cake. Pipe a border of frosting around the top edge. Blend in a tiny bit of yellow (or any color) gel coloring and pipe swirls around the top third of the sides. Blend in some more gel coloring and pipe a second layer of swirls. Blend in even more gel coloring and pipe the remaining layer of swirls. As you go, fill in gaps with little star-shaped frosting piping.

TIP for piping: use a big star-shaped piping tip. Start in the middle of a rose and swirl around it about 1.5-2 times. Stop squeezing when you’re done and gently pull the tip away. Repeat! To make the little stars, switch to a smaller star piping tip and squeeze just enough to fill the gaps, then stop squeezing and pull away. It gets easier with practice, I promise!

~~~~~~~~~~~~~~~~~~~~~~~~~~~~~~~~~

yellow ombre swirled frosting flowers cake

Ahh I just love a yellow cake, so happy!

Chocolate Chai Cake with Cinnamon Cream Cheese Frosting

chocolate chai cake cream cheese frosting

Mm, chai tea, how are you so delicious? Warm in a mug or cool in a iced concoction, loaded with spices, sweetened up with sugar, creamed to perfection with milk… you are the stuff of dreams. Of hot sticky summer days and bitterly cold winter afternoons. Of quick escapes from the lab with friends, dashing to our favorite local coffee shop. Of fond memories and future adventures. You make my heart smile.

chocolate chai cake cream cheese frosting slice view

While I can’t say I’d eat this cake as often as I drink chai tea (but, HELLO: check out this epic guide for making your own chai tea!), I will say that this cake is incredible. Spicy and sweet, the subtle chocolate flavor is mostly lost to the warm, fall-flavored spices. Trust me when I say you won’t mind. My favorite part is the drool-worthy cinnamon cream cheese frosting, though, and this recipe will leave you with about a cup of extra frosting that is a perfect spread for graham crackers. This cake would be ideal for any fall or winter celebration (cardamom, cinnamon, cloves, nutmeg, and ginger are the stars of cold weather) as a unique alternate to pumpkin, gingerbread, etc. treats. Your guests will love you for sure!

Check out all those flecks of cinnamon in the frosting, and dusting the top! These are the little things that make life special.

Check out all those flecks of cinnamon in the frosting, and dusting the top! These are the little things that make life special.

This recipe comes from What Megan’s Making. She adapted a Taste of Home recipe for chocolate chai mini loaves and turned it into cupcakes. Brilliant! I doubled her ingredients and made it into this delicious cake. I’m pretty sure that however you choose to eat this, you’ll agree: masala chai spices are fantastic in baked goods!

~~~~~~~~~~~~~~~~~~~~~~~~~~~~~~~~~~~~~

CHOCOLATE CHAI CAKE

4 ounces semisweet chocolate, chopped

1 cup water

1 cup unsalted butter, softened

2 cups brown sugar
, packed

4 eggs

2 tsp. vanilla extract

3 cups all-purpose flour

1 1/2 tsp. ground cardamom

2 tsp. ground cinnamon

1/2 tsp. ground ginger

1/4 tsp. cloves

1/4 tsp. ground nutmeg

2 tsp. baking soda

1 tsp. salt

1 cup sour cream

~~~~~~~~~~~~~~~~~~~~~~~~~~~~~~~~~~~~~

CINNAMON CREAM CHEESE FROSTING

16 ounces cream cheese, softened

1 cup unsalted butter, softened

4 tsp. vanilla extract

5 cups powdered sugar

Cinnamon, to taste

~~~~~~~~~~~~~~~~~~~~~~~~~~~~~~~~~~~~~

Make the cake:

1. Preheat the oven to 350 degrees Fahrenheit. Prepare three 9-inch cake pans by greasing the bottoms and sides, cutting out circles of parchment or wax paper and lining the bottoms of the pans, and then greasing the paper tops. Set aside.

2. Whisk together the flour, spices, baking soda, and salt in a bowl; set aside. Melt the chocolate and water together in a microwave; stir until smooth. Cool slightly.

3. In a large bowl, cream the butter and brown sugar until light and fluffy. Add eggs, one at a time, beating well after each addition. Beat in vanilla, then chocolate mixture. Add the flour mixture to the creamed mixture, alternating with the sour cream.

4. Divide the cake batter evenly between the three pans. Bake at 350° for 20-25 minutes (rotate halfway through) or until a toothpick inserted in the center comes out clean. Cool for 10 minutes before removing from pans to a wire rack to cool completely.

Make the frosting:

1. Beat together the cream cheese and butter in the bowl of an electric mixer until smooth and well-mixed, about 2-3 minutes. Mix in the vanilla extract.  Gradually beat in the powdered sugar until completely incorporated.

2. Keep the mixer running while you sprinkle in cinnamon. Sample periodically and stop adding cinnamon when you can see flecks throughout and it tastes good. I probably added about a teaspoon when it was all said and done.

Assemble the cake:

1. Prepare your cake plate by placing small strips of wax paper in a circle about the size of your cake (this will catch the frosting spills and keep your plate looking pretty).

2. If necessary, use a serrated knife to level off the rounded tops of each cake. Place one of the cake rounds on the wax paper circle (the wax paper should be partially under the cake), with the serrated side facing up. Put a generous amount of frosting on top and smooth it out to an even layer. Put a second cake round on top and spread more frosting on generously; place the final cake round bottom-up so the top is smooth.

3. Spread a thin layer of frosting all over the sides and top of the cake. This is called a “crumb coat” and will effectively seal in all the crumbs, so when we frost “for real” later, it’ll look magnifique! Put the cake in the fridge for 10 minutes.

4. Remove the cake and frost with generous scoops of frosting, spreading it all over the sides and top. Leftover frosting (I had about a cup) can be eaten with a spoon or used as a dip for graham crackers, pretzels, etc. If you want, carefully sprinkle cinnamon on top of your cake for decoration.

~~~~~~~~~~~~~~~~~~~~~~~~~~~~~~~~~~~~~

chai tea cake chocolate cream cheese frosting top

That’s it! All the flavors of chai tea wrapped up in one marvelous cake and perfectly paired with the best cinnamon cream cheese frosting. Your house will smell incredible, your taste buds will thank you, your guests will compliment, and you will beam!

Simple Birthday Bliss: Yellow Cake with Chocolate Frosting

yellow butter cake chocolate frosting

When I sat down on the bus this morning with this cake in my lap, two young girls behind me (around 9 or 10 years old) whispered to each other, “That’s a yummy-looking cake!” I smiled, turned around, and said, “I made it for my friend’s birthday! It’s a yellow cake with chocolate frosting!” They grinned at me and started chattering away. One of the girls, a cutie with chin-length brown hair and a smattering of freckles, told me about the desserts she’s made with her mom: a yellow cake, a chocolate cake, and chocolate chip cookies with strawberries (um, what?!). I told her I had never added strawberries to my cookies before, but that I would give it a try, and she lit up at that idea. She then offered, “You wanna know the secret to the best cakes and cookies no matter what?” She leaned closer to me conspiratorially and announced, “Lemon and vanilla! You just add lemon and vanilla to everything, even if it doesn’t call for it. That’s the way you get the best cakes!” I asked her a few more questions about this surprising secret, then turned to her friend who had been mostly silent up until now. This adorable girl, with curly blonde hair and petite glasses framing her big eyes, excitedly shared that her mom was “a CHEF!!” and could make “everything – cakes, pastries, cookies, pies, and lots of other things!” We chatted about her mom’s talents for a bit, and then another girl of about 16 or 17 years (I believe she was working the summer camp that these two were part of) chimed in that she had “made a chocolate cake with beets, and you couldn’t even taste the beets, it was just really moist and dense and awesome!” And just like that, the four of us were having a conversation – on a bus – about everything. The summer camp they were a part of, the languages they spoke, how I’m an engineer for work and baker by hobby, the best desserts we’ve ever had… My favorite part of all of this was how obvious it was that the preparation and eating of food had formed bonds, inspired admiration, and caused excitement in these girls’ lives. How happy they were, and how comfortable it was, to have a conversation with a stranger on the bus, all because of a cake!

And the thing is, this isn’t even the first time I’ve had people comment on my desserts. It’s nearly impossible to make the trek from apartment to work without having at least one random person comment on or joke about whatever I’m carrying. “Is that for me?” “How thoughtful – you knew it was my birthday!” “What kind of cake is that?” “Oh wow, that looks delicious!” “You’re going to share with me, right?” “What’s that for?” “Did you make that?” “I should probably taste test that for you…” “I’m so jealous of whoever gets that!” Clearly, there’s something about desserts that allows people to let down their guard and interact. Something that tips them off that it’s okay to talk, that no one’s going to look at them strangely or brush them off or turn away if they strike up a conversation. This is the power of cake. It makes strangers into friends, if only for the duration of a morning commute. And I love it.

 yellow white cake chocolate frosting

This cake is a very simple, traditional yellow cake with chocolate frosting per request for Anthony’s birthday. Well, actually, he originally requested a “life-size castle cake” that he “could walk into,” but alas, that was not to be. Maybe when he graduates… Can you even imagine how much flour, sugar, butter, eggs, etc. you’d go through to make that?! Not to mention all the structural issues inherent in making walls and roofing out of cake. There would have to be lots of reinforcement (boards? wood? poles??) and “glue” (some super strong frosting?). I’m not quite up for that challenge, yet! Simple and classic it had to be.

I found recipes on both Smitten Kitchen and Annie’s Eats that looked promising, and ended up going with Annie’s mostly because I had all the ingredients on hand. Just a few slight adjustments to try and make it extra moist, and I ended up with a nice medium-density: not too fluffy but definitely not heavy. The frosting was chocolatey, airy, and practically melting off the sides – I decorated this morning, so I never refrigerated it. Luckily, this “rustic” style of decorating (large swirly swoops of frosting) lent itself well for touching up melting sides. If you make this, keep it out of the sun and/or refrigerate it (although in the comments on Annie’s page, people mentioned issues where the frosting hardened too much in the refrigerator and wouldn’t soften even after it had been out for a while). As for the taste, it’s good but not great: it’s a classic yellow cake with chocolate frosting. Hard to mess up, hard to fall in love with. At least in my, make-it-as-rich-as-possible mindset. Still, for what it is, it’s pretty delicious.

~~~~~~~~~~~~~~~~~~~~~~~~~~~~~~~~~~~~~~~~

YELLOW CAKE

Recipe slightly adapted from Annie’s Eats, originally from Baking Illustrated.

2 sticks (1 cup) unsalted butter, at room temperature, plus more for greasing pans

1½ cups all-purpose flour, plus more for dusting pans

2 cups cake flour

1 tbsp. baking powder

1 tsp. baking soda

1 tsp. salt

2 cups granulated white sugar

4 large eggs

2 tsp. vanilla extract

1 cup plain Greek yogurt or sour cream

1 cup milk

~~~~~~~~~~~~~~~~~~~~~~~~~~~~~~~~~~~~~~~~

CHOCOLATE FROSTING

Recipe slightly adapted from Annie’s Eats, originally from Baking Illustrated.

1 lb. semisweet chocolate, finely chopped

6 tbsp. Dutch-process cocoa powder

6 tbsp. boiling water

3 sticks (1½ cups) unsalted butter, at room temperature

1 cup powdered sugar

Pinch of salt

~~~~~~~~~~~~~~~~~~~~~~~~~~~~~~~~~~~~~~~~

Make the cake:

1. Preheat the oven to 350˚ F. Line the bottoms of two 9-inch round cake pans with parchment paper. Butter and flour the edges of the pans, tapping out the excess; set aside.

2. In a medium bowl, combine the all-purpose flour, cake flour, baking powder, and salt; whisk together and set aside.

3. In the bowl of an electric mixer, combine the butter and sugar. Beat on medium-high speed until light and fluffy, about 4 minutes, scraping down the bowl as needed. Mix in the eggs one at a time, beating well after each addition. Blend in the vanilla. With the mixer on low speed, add in the dry ingredients in three additions, alternating with the milk. Beat each addition just until incorporated, scraping down the sides of the bowl frequently.

4. Divide the batter between the prepared baking pans. Bake, rotating the pans halfway through baking, until the cakes are golden and a toothpick inserted in the center comes out almost clean, 35-40 minutes. Transfer the pans to a wire rack and let cool ~20 minutes. Run a knife around the edge of the pans to help remove the cakes. Invert the cakes onto the rack and peel off the parchment. Let the cakes cool completely before frosting.

Make the frosting:

1. Place the chocolate in a plastic, microwave-safe bowl and microwave for 1 1/2 minutes. Stir well until the chocolate has melted and is smooth; you may need to microwave for additional 10-15 second bursts, stirring each time. Set aside and let cool to room temperature, about 25-30 minutes. In a small bowl, combine the cocoa powder and boiling water; stir until the cocoa is dissolved and then set aside.

2. In the bowl of an electric mixer, beat the butter, powdered sugar and salt on medium-high speed until light and fluffy, 3-4 minutes. Add the room-temperature melted chocolate; beat on low speed until combined, 1-2 minutes. Beat in the cocoa mixture until well blended. You may need to let it cool longer before using it to frost if it’s too runny at this point.

Assemble the cake:

1. Place one of the cake layers on a serving platter. Top with 1 cup of the chocolate frosting and smooth over the top of the cake.

2. Top with the second cake layer. Frost the top and sides of the cake with the remaining frosting as desired (I had some left over). And of course, decorate with sprinkles if you like happiness!

This is best if served the same day, but you can also keep it refrigerated, covered, for up to 3 days. Let the cake come to room temperature at least 30 minutes before serving.

~~~~~~~~~~~~~~~~~~~~~~~~~~~~~~~~~~~~~~~~

chocolate frosting sprinkles cake decorating

Nanaimo Bars

For being so on top of the Fourth of July (did you make the star-spangled cupcakes yet?), I sure failed at alerting you to the other major holiday of the week: Canada Day!

(July 1, for you oblivious folks out there)

nanaimo bars canada day dessert

Canada is the only country I got to visit outside of the U.S. during the first 18 years of my life. I owe a lot to our northern neighbor: Grandma’s love of Cribbage. Older cousins who let us braid, clip, pin, and tie their hair. Hours-long drives through gorgeous forests. Grinning every time I hear “loonie” and “toonie.” Learning how to play A**hole/Janitor (depending on whether the children are playing) late into the night. Tim Horton’s (not for coffee, seeing as I was a kid and also don’t like coffee, just pastries). Coasting down a river in giant inner tubes. Multi-story indoor-and-outdoor water fights. Crazy, awesome, hilarious relatives. Snow. Snow on Christmas (we don’t get that in California). Oh, yeah, and my dad, who coincidentally is responsible for my last name and thus the name of this blog. He’s pretty cool I guess, so thanks for him, Canada!

canada day dessert nanaimo bar

Canada also gave me Nanaimo Bars. Aka nana-what?! bars. Aka “Finding Nemo?” bars. Aka nanananananaMO!! bars. Aka a chocolate coconut cookie-like base, vanilla kind-of-custard-kind-of-frosting filling, and smooth chocolate on top. Aka perfection out of the fridge. Aka try these now, and you can appreciate a little slice of Canada without the travel cost. Aka thanks, Canada, you rock!

~~~~~~~~~~~~~~~~~~~~~~~~~~~~~~~~~

NANAIMO BARS

Recipe from Hidden Ponies

Base layer:

¾ cup unsalted butter

¼ cup granulated sugar

6 tbsp. cocoa

1 large egg

1 tbsp. milk

1 tsp. vanilla extract

2 cups graham cracker crumbs

1 cup shredded coconut

Middle layer:

½ cup unsalted butter, softened

6 tbsp. milk

4 tbsp. custard powder (or instant vanilla pudding powder)

4 cups powdered sugar

Top layer:

8oz (8 squares) semisweet or dark chocolate baking squares (NOT chocolate chips; they won’t melt properly)

1 tbsp. unsalted butter

~~~~~~~~~~~~~~~~~~~~~~~~~~~~~~~~~

1. Make the base first. Combine the first 6 ingredients in a large saucepan. Heat and stir over medium-low heat until mixture is smooth. Remove from heat. Stir in the graham crumbs and coconut. Pack firmly into ungreased 9×13” pan. Place in the refrigerator while you prepare the middle layer.

2. To make the middle layer, beat all four ingredients together in a medium bowl until smooth. Spread evenly over the first layer. Chill for at least 45 minutes.

3. When the second layer is chilled, make the top layer. Melt the chocolate and butter in a small bowl at 50% power in microwave. Microwave for about 1½ minutes, then stir thoroughly. Microwave another 30 seconds or longer if needed, stirring frequently. Spread fairly evenly over middle layer. Chill for 1 hour, then score chocolate with a sharp knife (aka make shallow cuts that will prevent your chocolate from cracking later) and return to fridge to chill completely before cutting into bars. Keep refrigerated until you’re ready to serve.

~~~~~~~~~~~~~~~~~~~~~~~~~~~~~~~~~

nanaimo bars canadian dessert

Red Velvet Fourth of July Cupcakes

red velvet fourth of july cupcake stars

Have you thought about the fact that we’re days away from July, the SEVENTH month of 2013? Where did the first half of this year go?!

red velvet fourth of july cupcakes stars

This also means we are rapidly approaching the Fourth of July! Just for you all, I made these cupcakes in advance so you can try your hand at them for your own July 4th celebrations. Just for you, I endured the puzzled looks of my professors and fellow grad students, who weren’t sure if I had just gotten the dates mixed up (“You do know the Fourth of July is on July 4, right?”) or if I was feeling suddenly patriotic (perhaps as a celebration of the recent SCOTUS rulings?). Just for you, I stayed up way past my bedtime to make these cupcakes and stars, then woke up early to cut out each red and white striped cupcake wrapping, whip up a batch of beautiful blue frosting, and assemble these star-spangled cuties. I did all of this so you can impress your family and friends at your own parties. So please, try these out and let me know how they are received!

fourth of july star spangled red velvet cupcakes

Reasons why I am extra excited about these cupcakes:

  1. I am utterly obsessed with the ease and beauty of adding chocolate decorations to everything (see: my last two posts).
  2. I found these red and white striped cupcake wrappers at You Make Do. For only $1, you get a pdf download of three wrappers with different stripe sizes, and can print off as many as you want! The only downside is you have to individually cut them out, but it’s much cheaper than purchasing pre-made striped wrappers.
  3. I finally ordered some large Wilton tips for decorating cupcakes, and I am completely in love with them. Frosting these cupcakes was such a cinch and so fun. You’ll be seeing more cupcakes on here now that I can actually make them look pretty! If you’re interested, I got: 1M, 2D, 6B, and 2A. A large coupler helps so you can easily switch between decorating tips for the same bag of frosting.
  4. I got a soft gel paste set from Americolor that is absolutely gorgeous (did you see that red velvet above? and how about the vibrant blue frosting?!). I may or may not be regularly pulling the box down from my cupboard just to gaze lovingly at the sweet little bottles of so many beautiful colors just begging to be used…

red and white stripes cupcake blue frosting stars

I’m usually a normal human being. I promise.

july 4 cupcakes american flag

I searched for cupcakes like this when the idea popped into my head, but couldn’t find anything. I found loads of red white and blue cupcakes, cupcakes with sprinkles, swirled cupcakes, american flag cupcakes, etc. but nothing quite like what I wanted. Which is surprising, because these cupcakes are designed to resemble American flags: red and white stripes on the cupcake wrapper, red velvet cupcakes, and blue frosting with white stars on top. Maybe someone’s done this already and I just couldn’t find it? Either way, I am quite pleased with how these turned out and hope you like them, too!

~~~~~~~~~~~~~~~~~~~~~~~~~~~~~~~~~~~

RED VELVET STAR-SPANGLED CUPCAKES

Makes: 24 cupcakes

Red velvet cupcakes:

Barely adapted from Annie’s Eats, originally from Saveur

2 1/2 cups cake flour

1 1/2 cups sugar

1 tsp. baking soda

2 tbsp. cocoa powder

1 tsp. salt

2 large eggs

1½ cups vegetable oil

1 cup buttermilk

3/4 tsp. red food coloring gel (liquid requires 2 tbsp.)

1 tsp. vanilla extract

1 tsp. distilled white vinegar

Buttercream frosting:

2 sticks (1 cup) unsalted butter, softened to room temperature

3-4 cups powdered sugar

2-3 tbsp. milk or heavy cream

1 tsp. vanilla extract

a pinch of salt

a few drops of blue food coloring gel

Stars:

~8 oz white chocolate chips

~~~~~~~~~~~~~~~~~~~~~~~~~~~~~~~~~~~

1. Preheat the oven to 350° F. Line cupcake pans with foil cupcake liners (paper will work, but the grease will stain your red & white outer wrappers more).

2. In a medium bowl, combine the cake flour, sugar, baking soda, cocoa powder and salt; whisk to blend. In a separate bowl using an electric hand mixer, combine the eggs, vegetable oil, buttermilk, food coloring, vanilla and vinegar. Beat on medium speed until well blended. Gradually mix in the dry ingredients on low speed and beat until smooth, about 2 minutes.

3. Divide the batter evenly between the prepared liners. Bake, rotating the pans halfway through baking, until a toothpick inserted in the center comes out clean, about 18 minutes.  Let cool in the pans 5-10 minutes, then transfer to a wire rack to cool completely.

4. While the cupcakes are baking and/or cooling, make the star decorations. Lay wax paper down on a moveable flat surface (cookie sheets, cutting boards, etc.). Place chocolate in a microwave-safe plastic bowl (not glass). Microwave in 10-second bursts, stirring after every burst. Between 3-5 rounds, you should be able to stir until smooth; you can microwave for additional 5-second bursts once it’s smooth, but do not over-heat! This video by How To Cook That provides a fantastic tutorial for this process. Put the chocolate in a plastic bag and snip off just the tip (don’t cut off too much). Pipe stars of various sizes onto the wax paper, making sure to add a thick “stem” to one of the bottom points (at least 2 cm) that will stick in the cupcake and hold the stars up. I made 3 stars per cupcake for a total of 72 stars, plus a few extras in case I broke any. Put the chocolate stars in the refrigerator to harden up.

5. When you’re ready to assemble the cupcakes, make the frosting. Beat the softened butter, vanilla, salt, and blue food coloring gel together until uniform. Gradually beat in powdered sugar, adding milk or cream as necessary to reach your desired consistency. If you decide to add extra blue food coloring, make sure you mix it in evenly. Scrape the sides of the bowl often.

6. Put the cupcakes in their red and white striped cupcake wrappers. Fill a decorating bag with frosting. Pipe frosting in large swirls on each cupcake, switching decorating tips throughout if you want a mix like I have here. When all cupcakes are frosted, remove the chocolate stars from the refrigerator and gently push them into the tops of the cupcakes.

~~~~~~~~~~~~~~~~~~~~~~~~~~~~~~~~~~~

red white and blue stars and stripes

Beautiful and easy – my favorite. These sweet cupcakes will make you look like a professional cupcake decorator even though we all picked up paper-cutting and star-drawing skills before kindergarden. They’re just so cute, with the vibrant colors and patriotic vibe!

wilton frosting tips cupcakes

red white and blue cupcakes stars stripes

Have a wonderful Fourth of July!

Musical Brownies

Is this some sort of strange version of musical chairs, where everyone runs around in a circle and when the music stops you must eat a brownie or else you’re out – except there are fewer brownies than people, and each time new brownies are added in smaller and smaller numbers, so the goal is to stay in the longest and therefore get to eat the most brownies?

music note brownies

No, it’s not. I’m really sorry.

white chocolate brownies

But if that is ever made into a game, I promise you: I will win.

Particularly if they are these brownies.

treble clef brownies

Remember the “omg drool just-like-box-mix” cocoa brownies I told you about earlier? Well, this time they’re getting an upgrade. Same amazing brownies, but topped with buttercream frosting and chocolate musical note garnishes. Although you really should be thinking “Brilliant!! I must make these immediately!”, if you are instead wondering why I would ever do this, then 1) stop questioning my genius ideas, and 2) my reason is that I needed to bake something for a blues dance. Blues → blue frosting, dance → music → music note garnishes. Compris?

music note dessert

I might just encourage (*ahem* force…) my future children to join band PURELY so I can sell these at band bake-sale fundraisers. Because, let’s be honest with ourselves here: who could avoid these temptress brownies?! That’s right. No one. You’re welcome, future child’s band, for all the money I will raise for you. You’re welcome.

~~~~~~~~~~~~~~~~~~~~~~~~~~~~~~~~~~~~~~~

MUSICAL BROWNIES

Cocoa brownies:

Recipe (barely adapted) from Smitten Kitchen, which Deb adapted from Alice Medrich’s Bittersweet

10 tbsp. (1 1/4 sticks) unsalted butter

3/4 cup granulated sugar

1/2 cup brown sugar

3/4 cup + 2 tbsp. unsweetened cocoa powder

1/4 tsp. salt

1/2 tsp. vanilla extract

2 large eggs, cold

1/2 cup all-purpose flour

Buttercream frosting: 

Adapted from: Gale Gand, on the Food Network

6+ cups powdered sugar (add until you’re satisfied with the consistency)

1 cup unsalted butter, softened

1 tsp. vanilla extract

1-2 tbsp. half-and-half (vary based on how much powdered sugar you have and what consistency you like)

Gel food coloring (blue for these; any color would work)

Chocolate garnishes:

6 oz semisweet chocolate (or milk or dark)

6 oz white chocolate

~~~~~~~~~~~~~~~~~~~~~~~~~~~~~~~~~~~~~~~

1. Preheat oven to 325 F. Push a sheet of parchment paper (or aluminum foil) into an 8×8-inch square baking pan; it won’t stay very well, but that’s fine – just make sure the edges and bottom are all covered. When you add the batter later, it’ll push the parchment paper into place.

2. Combine the butter, sugars, cocoa, and salt in a medium bowl (heat-safe) and microwave for 30 seconds. Stir together gently until as well-mixed as you can get it, then microwave an additional 15 seconds. Stir together until thick and completely mixed. The batter should be warm to the touch; additional, short bursts of microwave time (don’t burn it!) may be necessary to get the batter warm.

3. Stir in vanilla extract then add eggs one at a time, stirring vigorously. When the batter is shiny and well-mixed, add the flour. Stir until it’s all mixed in, then beat vigorously for 40 strokes (incorporating air gives your brownies some “lift” and ensures they aren’t too flat/dense).

4. Pour into the parchment paper-lined pan and spread evenly. Bake for 30-35 minutes, until a toothpick comes out just slightly moist with batter.

5. While the brownies are cooking, make the chocolate garnishes. Lay wax paper down on a moveable flat surface (cookie sheets, cutting boards, etc.). Place chocolate in a microwave-safe plastic bowl (not glass). Microwave in 10-second bursts, stirring after every burst. Between 3-5 rounds, you should be able to stir until smooth; you can microwave for additional 5-second bursts once it’s smooth, but do not over-heat! You want the chocolate to stay “in temper” as much as possible. This video by How To Cook That provides a fantastic tutorial for this process (note that I used chocolate chips instead of chocolate shavings; it still worked). Put the chocolate in a plastic bag and snip off just the tip (don’t cut off too much). Pipe different music notes, treble clefs, etc. onto the wax paper, making sure to add a thick “stem” to the bottom (at least 2 cm) that will stick in the brownie and hold the design up. Put chocolate garnishes in the refrigerator to harden up.

6. When the brownies are done cooking, cool them completely (I put mine in the freezer for about 30 minutes) and then lift the paper + brownies out and set aside.

7. Once the brownies are completely cooled, make the frosting. Beat together half of the sugar and all of the butter. Start on low speed until well-blended and then gradually add in more sugar. Increase speed to medium and beat for another 3 minutes. Add vanilla and cream and continue to beat on medium speed for 1 minute more, adding more cream or powdered sugar as necessary to reach spreading consistency. Gel food coloring should be beat or stirred in as desired to reach the color you’re looking for. Put the frosting into a piping bag with any decorating tip you like.

8. Cut the brownies into ~25 small squares and then pipe frosting onto each brownie. Gently inset a music note into every brownie, holding the garnish by its base so you don’t snap the top off while you’re pushing it down.

~~~~~~~~~~~~~~~~~~~~~~~~~~~~~~~~~~~~~~~

white chocolate musical brownie

I was so smitten with the way these turned out, I took them up to our balcony for a mini photo shoot. Here you can see our incredible view (and more brownies, of course):

musical brownies balcony

sunset and brownies


In case you’re curious, these were a huge hit and did not last long before every last one was snatched up by a happy dancer. Not bad for something that’s super easy to make in under two hours! You could easily top them with any other garnish (stars, hearts, simple logos, etc.). Get creative!

Chocolate Quintet Cake

(Kelsey’s note: the chocolate cake insisted on writing his own post today. I would have resisted, but I was too busy eating rich, moist, over-the-top chocolatey cake and falling into a deep, sugar-induced coma that I couldn’t think straight. I apologize if he says anything… strange.)

best ever rich chocolate cake overload

Hey there. Thanks for stopping by. I know there are a lot of cakes out there, and you have plenty of options, so I appreciate you taking the time to figure out if we could be right for each other. You’re probably used to fairly normal chocolate cakes by now, but I assure you that I am not your average cake. If you give me a chance, I’ll help you bring some excitement back into your life. A little fudge, some ganache, chocolate garnishes – just to keep life interesting, you know? Some of us try to push the boundaries a bit. Maybe we could push boundaries together?

chocolate garnishes decorations

I guess I should tell you a bit about me. My favorite color is brown, but I couldn’t possibly pick a favorite shade. I prefer cooler climates, since the heat makes me feel like I’m melting. I’m super rich, and there’s a lot of me to go around. There’s never a dull moment with me: I’m the total opposite of dry. All I need is a tall, cool glass of milk to make my life complete.

rich chocolate cake

I’ll give you some of my specifics, and then let’s get back to discussing how we could be so good together… 

~~~~~~~~~~~~~~~~~~~~~~~~~~~~~~~~~~~~~~

MY FAVORITE CHOCOLATE CAKE

From Smitten Kitchen, originally from Sky High: Irresistible Triple-Layer Cakes

2 cups all-purpose flour

2 1/2 cups sugar

3/4 cup unsweetened cocoa powder

2 tsp. baking soda

1 tsp. salt

1 cup vegetable oil

1 cup sour cream

1 1/2 cups water

2 tbsp. distilled white vinegar

1 tsp. vanilla extract

2 large eggs

~~~~~~~~~~~~~~~~~~~~~~~~~~~~~~~~~~~~~~

CHOCOLATE FUDGE FILLING

Halved from Annie’s Eats, which she adapted from David Lebovitz

6 oz. bittersweet or semisweet chocolate, chopped

1 1/2 tbsp. light corn syrup

2 1/4 tbsp. unsalted butter

3/4 cup heavy cream

(+ powdered sugar if you have consistency issues like I did)

~~~~~~~~~~~~~~~~~~~~~~~~~~~~~~~~~~~~~~

CHOCOLATE FROSTING

Adapted from Cathy Lowe on the Food Network

3 cups powdered sugar

3/4 cup unsweetened cocoa powder

1 1/2 sticks unsalted butter, softened to room temperature

3-4 tbsp. heavy cream

~~~~~~~~~~~~~~~~~~~~~~~~~~~~~~~~~~~~~~

CHOCOLATE GANACHE

Adapted from Smitten Kitchen, originally from Sky High: Irresistible Triple-Layer Cakes

10 oz semisweet chocolate, coarsely chopped (or a bag of chocolate chips)

2 tbsp. light corn syrup

1/2 cup heavy cream

~~~~~~~~~~~~~~~~~~~~~~~~~~~~~~~~~~~~~~

CHOCOLATE GARNISHES

Inspired by How To Cook That (← this link takes you to her fascinating YouTube video on making chocolate garnishes)

6 oz milk chocolate (or any kind of chocolate)

~~~~~~~~~~~~~~~~~~~~~~~~~~~~~~~~~~~~~~

Overview:

Make the cake; while it’s in the oven, make the chocolate fudge filling. Put the filling in the refrigerator. Make the chocolate garnishes and put these in the refrigerator. At some point, the cake will come out of the oven. After letting it cool on the counter for a bit, stick it in the refrigerator/freezer. {about 1-2 hours later} When the fudge filling is thick and the cakes are completely cool, whip up the chocolate frosting and assemble everything. Stick the cake in the refrigerator while you make the chocolate ganache. Remove the cake to pour the ganache over the top and down the sides. Finish off with the chocolate garnishes and refrigerate until about an hour before you serve the cake.

~~~~~~~~~~~~~~~~~~~~~~~~~~~~~~~~~~~~~~

Directions to make the cake:

1. Preheat the oven to 350 degrees F. Grease the bottoms and sides of three 8 or 9-inch round cakepans, line the bottom with circles of parchment or waxed paper, and grease the paper.

2. In a large bowl, whisk together the flour, sugar, cocoa powder, baking soda, and salt. Add the oil and sour cream; whisk to blend. Gradually beat in the water. Blend in the vinegar and vanilla. Whisk in the eggs and beat until well blended. Scrape down the sides of the bowl and be sure the batter is well-mixed. Pour into the prepared cake pans, dividing evenly among all three.

3. Bake for 30-35 minutes, or until a toothpick inserted in the center comes out almost clean. Let cool in the pans for about 20 minutes. Invert onto wire racks, carefully peel off the paper liners, and let cool completely. Put the cakes in the freezer for at least half an hour before you frost them.

Directions to make the chocolate fudge filling:

1. Combine the chocolate, corn syrup, and butter in a heat-safe bowl. Set aside.

2. Heat the cream on the stove until it begins to boil. Remove from the heat and pour over the chocolate mix. Let sit for 1 minute and then stir until smooth and there are no lumps remaining.

3. Refrigerate for at least 2 hours, removing every 15-30 minutes to stir (to make sure it cools evenly).

*Note: my filling never thickened up, which I think might be because I removed the cream from the heat too soon. If you have this issue, too, simply pour the chilled chocolate mix in a bowl and beat in powdered sugar until it becomes filling-consistency: thick, fluffy, and holds its shape.

Directions to make the chocolate garnishes:

1. Lay wax paper down on a moveable flat surface (cookie sheets, cutting boards, etc.).

2. Place chocolate in a microwave-safe plastic bowl (not glass). Microwave in 10-second bursts, stirring after every burst. Between 3-5 rounds, you should be able to stir until smooth; you can microwave for additional 5-second bursts once it’s smooth, but do not over-heat! You want the chocolate to stay “in temper” as much as possible. This video by How To Cook That provides a fantastic tutorial for this process (note that I used chocolate chips instead of chocolate shavings; it still worked).

3. Put the chocolate in a plastic bag and snip off just the tip (don’t cut off too much). Pipe whatever designs you want on the wax paper, making sure to add a thick “stem” to the bottom that will stick in the cake and hold the design up. Put chocolate garnishes in the refrigerator to harden up.

Directions to make the chocolate frosting:

1. Whisk together the powdered sugar and cocoa powder. Set aside.

2. In a separate bowl, beat together the butter and 1 cup of the sugar mix. Beat in 1 tbsp. of cream and 1 more cup of the sugar mix; repeat until all the sugar is incorporated. Scrape down the sides of the bowl and beat until fluffy. Add more cream or powdered sugar if needed to bring the frosting to a good spreading consistency.

Directions to make the chocolate ganache:

*Make this once your cake is already assembled — see below!*

1. Combine the chocolate and corn syrup in a microwave-safe bowl and heat in 15-second bursts, stirring each time until it’s smooth and all the chocolate is melted. Whisk in the heavy cream and stir until completely smooth.

2. Pour over the top of your frosted cake, and gently push small sections of the chocolate off the top so it drips down the sides in long lines.

Assemble the cake:

1. Place strips of wax paper in a circle on your cake stand or plate. Place one of the cake rounds down so that the strips are sitting just underneath the edges of the cake and sticking out (to catch drips and keep your plate pretty).

2. Slather half of the fudge filling on top of the cake round. Make sure you push it all the way to the edges and spread it evenly. Place a second cake round, top down, on top of the filling. Slather the remaining fudge filling on this cake and top with the third, and final, cake round.

3. Crumb coat the entire outside of the cake. Put the cake in the fridge for 10 minutes. Remove and generously coat the entire cake in frosting.

4. Make the chocolate ganache. While it’s still warm, pour over top of the cake and gently push sections off the side of the cake so it dribbles down. You can either pour this over the entire top of the cake (in which case, use all the ganache), or just on the outer rim like I did (use about 3/4 of the ganache). I used an offset spatula to smooth it into a pretty ring.

5. Carefully stick the chocolate garnishes into your cake. Refrigerate until an hour before you wish to serve the cake. When you cut this cake, it’s especially important to wipe the knife clean after each slice because all the different types of chocolate will stick to your knife and make it difficult to cut pretty, non-mangled slices.

~~~~~~~~~~~~~~~~~~~~~~~~~~~~~~~~~~~~~~

Are you still with me? Good. Because you’ll find that there’s even more to me once you take the time to get to know me. Underneath my shell, I’m bursting with different layers, flavors, and textures. There’s more to me than meets the eye, which is saying a lot considering how I am pretty easy on the eyes…

rich chocolate cake

That said, don’t go thinking I’m some stunningly gorgeous but intellectually-hollow cake. I’m not just a pretty face! I’ve got the brains to match. Just look at this photo of me with books. See how intelligent I am?

rich chocolate cakeI think this might be true love, you and me!

Spiced Oatmeal Raisinet Cookies

oatmeal raisinet cookies

Let’s say you’re craving cookies. So you ask the boy what he wants. And he says oatmeal raisin. So you decide to make oatmeal raisin chocolate chip, because (as you know) everything’s better with chocolate. Now let’s say you ask that boy to run to the grocery store for you and pick up raisins and chocolate chips, among other ingredients. What do you think will happen?

oatmeal raisin cookies top

Instead of coming back with raisins and chocolate chips, he comes back with raisinets “because they’re cheaper and amazing.” At first I was appalled – that’s not what I requested! But then I realized his genius: not only were chocolate-covered raisins cheaper than buying both raisins and chocolate chips, but also you get a perfect pairing of chocolate and raisin in every mouthful. No more will you bite into an oatmeal cookie only to get loads of raisins and no chocolate, or vice versa. No, sir! These cookies have the perfect distribution of the recipe’s key ingredients. Believe me: it shows as soon as you dig in. Add the extra spices and instant coffee to highlight it all, and you end up with crunchy-on-the-outside-and-soft-in-the-middle cookies that are absolutely bursting with the best of the best flavors.

oatmeal raisinet cookies cut

I’m quite proud of these.  This is my second time making them (I almost never repeat recipes, mind you!) and they’ve gotten rave reviews both times. They’re inspired by Martha Stewart’s cookies, but changed up enough to call this an original recipe. Does that give me street cred in the baking world?? Although, I suppose the boy should get some credit for the raisinet idea…

oatmeal raisinet cookies stacked

~~~~~~~~~~~~~~~~~~~~~~~~~~~~~~~~~~~~

SPICED OATMEAL RAISINET COOKIES

1 ½ cups all-purpose flour

1 tsp. baking soda

1 tsp. salt

2 tbsp. instant coffee, finely ground

2 tsp. cinnamon

¼ tsp. cloves

¼ tsp. nutmeg

1 cup (2 sticks) unsalted butter, room temperature

¾ cup packed light-brown sugar

¾ cup granulated sugar

2 large eggs

1 tsp. vanilla extract

2 ½ cups rolled oats

1 ½ cups pecans or walnuts, finely chopped

1 ½ cups raisinets (chocolate-covered raisins)

~~~~~~~~~~~~~~~~~~~~~~~~~~~~~~~~~~~~

1. Preheat oven to 375 degrees F. In a medium bowl, whisk together flour, baking soda, salt, instant coffee, cinnamon, cloves, and nutmeg. Set aside.

2. In a separate bowl, use an electric mixer to cream the butter and
sugars until light and fluffy. Add the eggs and vanilla; beat until combined, scraping down the sides of bowl as needed.

3. Slowly add the flour mixture to the wet ingredients; beat until just combined. Stir in the oats, pecans, and raisinets.

4. Drop golf-ball-sized scoops of batter about 2-inches apart on greased baking sheets. Bake until cookies have spread and are golden brown and soft to the touch, approximately 12 minutes. Cool for a few minutes on the hot sheets and then transfer
to a wire rack to cool completely.

~~~~~~~~~~~~~~~~~~~~~~~~~~~~~~~~~~~~

Not much more to say here, folks. These cookies are nutty, crunchy on the outside, chewy on the inside, chocolate-and-raisin-y goodness, with hints of coffee, cinnamon, and spices. Absolument glorieux!

oatmeal chocolate raisin cookies